Blog

Entries

Input Devices

In this article I would like to explore input devices. I spend a lot of my time interacting with computers and think that we should try to make that experience as optimal as possible.
↘️ Skip to the latest update

January 2021

a small ortholinear keyboard on the left and a pen tablet on the right
My current setup as of January 2021
I recently bought a One by Wacom just to try it out. The tablet worked out of the box on Archlinux, so I decided to just replace my mouse for the time being. As always, switching input methods is uncomfortable and feels 'wrong', but because I was on holiday I could take the time to get familiar with it.
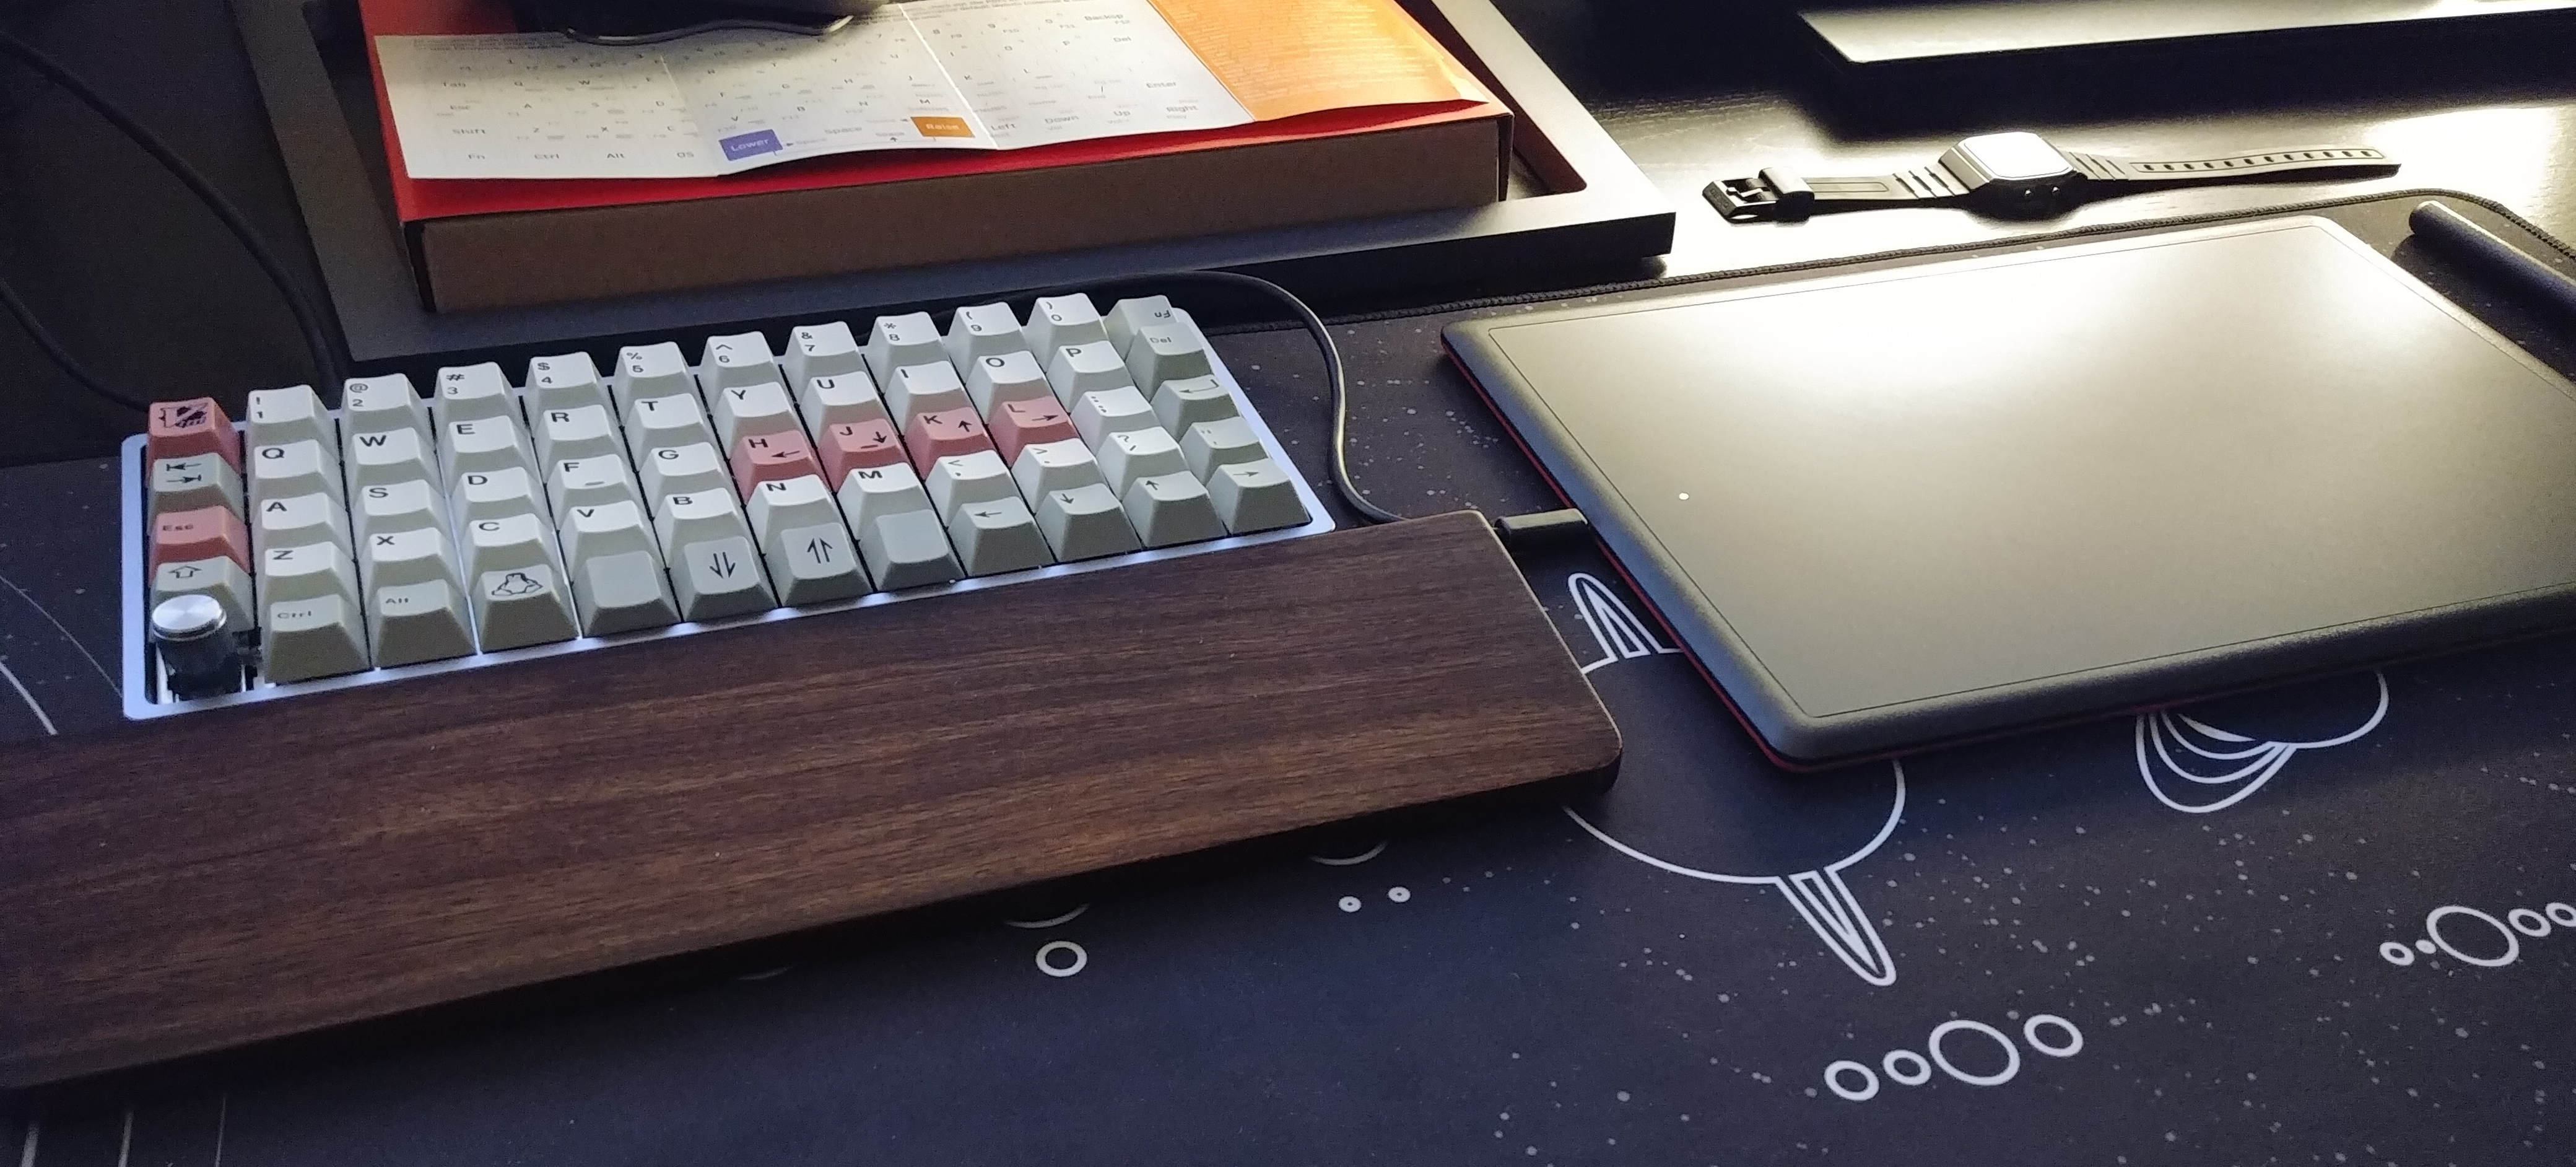
At the same time, I also switched from a full size keyboard to the rather smaller Preonic. Not only is it 'missing' a bunch of keys, it also sports an ortholinear layout, meaning the rows aren't horizontally offset. The ortho-linearity was not a big issue, but remembering the combinations for the various special characters is still ongoing.
When building the keyboard, I included a rotary encoder which acts as a scroll wheel and volume knob.

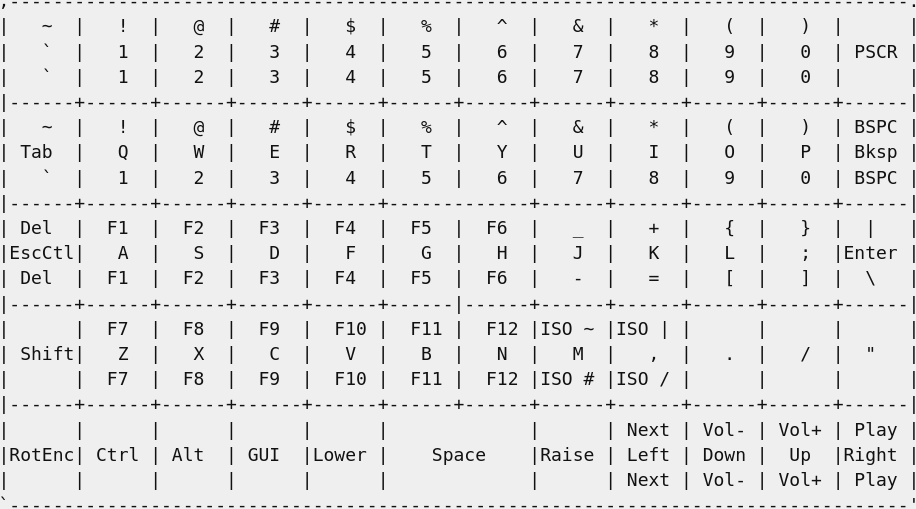
Click here to see the keyboard layout in detail If you're interested in trying my keymap on your Preonic, or just want to take a closer look, you can find my QMK fork on GitLab.
The ASCII-Art image below shows the keyboard layout. QMK supports a concept called 'layers', which can be thought of like the shift key. If the raise or lower keys are pressed, the upper, resp. lower keycodes are invoked instead of the center one.
For example: As usual K yields k, raise + K yields =, and lower + K yields +.
The entire keymap is very close to the default keymap the Preonic ships with.
an ascii art table of a keyboard layout
The current layout of the Preonic

Conclusion

After two weeks, I must say that the pen tablet is a surprisingly intuitive input method. It is also very comfortable, because I can hold the pen in a relaxed, natural way. As for the keyboard, I'm still getting used to it and there is a higher frequency of typos. Not moving my hands far away from the home row is great, and it feels right.

February 2021

After about 5 weeks of usage I'm mostly used to the new keyboard layout. I think the layout is good, but I would like to try a split keyboard. Current candidates I'm looking at are: As for pointing devices, I'm switching between the Wacom and the MX Ergo regularly. I've found that using the Wacom for extended periods of time causes wrist pain, because my forearm rests on the desk while using it. This is probably due to bad posture, but that's another project.

LED Panel

led matrix showing the current time and weather
The finished LED Panel with Layout
I built this panel as a project during the summer holidays. This is a small writeup so you can build your own. The entire thing ran me about 200.- CHF, but you could probably find some of the parts for cheaper.

The software is available on my Gitlab.

Features

The panel displays the current time/date and temperature, and the current weather as an icon. Different icons are used depending on the time of day. It’s fairly extensible, thanks to the layouts mechanic I built (more below).

Parts List

I followed the Adafruit guide for the hardware side of things.

Hardware

Below a quick sketch of how I built this. My woodworking skills aren’t the best, so this is built to be easy.
a hand-drawn sketch of the physical assembly of the panel
A hand-drawn sketch of the physical assembly of the panel.

Software

For real-time weather data, aswell as forecasts I used OpenWeatherMap's API.

For the display, I built some helper-classes: You can create DisplayComponents and draw them into pre-defined areas. A component could be responsible for displaying the current time, or a weather icon. They are responsible for rendering themselves onto the pixel matrix.

A layout is made of multiple areas and the display switches between different layouts every minute, to avoid unevenly stressing the LEDs.

a potential layout, using one half area, and two quarter areas
A layout could consist of a half area, and two quarter areas.

Breaking Audible DRM

I wanted to to listen to "Skunk Works" with a free audible trial.
Pleasantly surprised, I notice that you can download the audbiobook. However, I quickly realised that it’s an .aax file. Try to play it using mpv; `Error decoding audio.`. It turns out that AAX is an encrypted audible format.

Authcode / Activation Bytes

Fortunately, someone created audible-activator, a python script which opens audible in a browser and extracts your personal DRM key. This key is unique to you, but you can decrypt all your books using it. To get the code, run the script, log in, and wait a second You’ll get an output like this: $./audible-activator.py Username: email@url.com Password: [*] Player ID is jrzt34fl3gS34z/p9KLLIw/ugaf= activation_bytes: c0ffeed00d I recommend saving the activation bytes to a file called .authcode in your home directory.

AAXtoMP3

Once you’ve extracted the activation bytes, you can use another tool, AAXtoMP3, to convert the AAX to a useable format, like MP3. $ AAXtoMP3 -s -- audiobook.aax This will create a directory structure based on the metadata in the AAX, containing the audiobook MP3. Passing the -s option makes sure only one file is generated. Otherwise, a file for each chapter will be generated, which you might like better.